

How to Draw A Sailing Boat. Sailing the seven seas is one of the most adventurous and liberating activities you can take part in, and if you want to do that, then a sailboat would be your best bet!
Also, check our cats coloring sheet.
These little jet skis can help you glide effortlessly across the ocean while searching for adventure.
Unfortunately, owning a sailboat isn’t for everyone, but learning how to draw a sailboat can be the next best thing.
How to Draw A Sailing Boat
Step 1
For this tutorial on how to draw a sailboat, let’s start with the sail first. You can start by drawing the frame of the sail, which is drawn with two straight lines very close to each other.
Next, we’ll extend a curved line from the top of this frame to the base.
This forms the sail sheet. We can add two more closely spaced lines at the sheet’s base for the sail’s bottom frame.
Once you’ve drawn them, you can move on to step 2!
Step 2
Now that you have created one sail sheet of your sailboat drawing, we can add another in this second step.
This sail is similar in shape to the previous one, except that it is reversed and does not have the same straight vertical frame as the other.
It will also be smaller and lower than the previous one but will have a similar straight bezel at the bottom.
After drawing and placing it as it appears in our reference image, we can move on to the next part.
Step 3
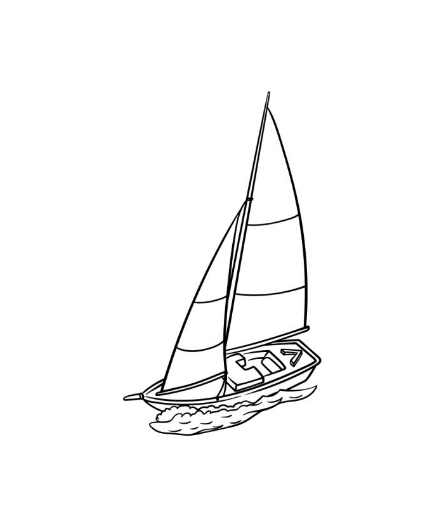
You’re done with the “Sail” part of the sailboat, and now you can start the “Boat” aspect in this step of our how to draw a sailboat guide.
The boat is viewed from top to bottom, and for the side, we can use curved lines to draw the outline culminating in a point at the front. The back of the boat is drawn with straight lines instead.
These outlines have a second outline next to these lines; once you have that, you can add some internal details.
These details are drawn using straight shapes for the area where the sailors would sit, along with some other details.
You can then finish this step with two short curved lines at the front and back of the boat for the start of the base.
Step 4
The next steps in this guide are all about adding the final details, elements and finishing touches to your sailboat design.
At the moment, we are adding some details to the sails, and these details will be easy to add! All you have to do is draw slightly curved lines horizontally across the sails.
You can even decorate the sails with a different pattern if you like!
Step 5
In this fifth step of this guide to drawing a sailboat, you’ll add some final details and elements.
For this step, we will use rough, curved lines to show the water breaking under the boat. Once you’ve drawn those water details, you’ve completed all the details in the guide!
Before proceeding, you can add some details to give it your twist. You could draw some people sitting on the sailboat or details of different patterns on the sails.
You could also draw some dolphins or whales jumping out of the water or a nice background.
These are a few ideas you could come up with. Be creative and have fun, so express yourself and see what happens!
Step 6
For the final step in drawing your sailboat, finish by adding some eye-catching colours.

In our reference image, we have shown a range of colours you can choose from, but these are just suggestions.
For this step, feel free to use any of your favourite colours to bring this image to life!
There is no limit to the colours you can use in this image, so get creative with them.
Once you know what colours to use, you can decide on the artistic mediums and tools to add them.
You could use some acrylic paints and crayons for some lighter colours that pop. Watercolour or coloured pencils would be ideal for softer, more muted colours.
Your Sailing Boat Drawing is Finished!